DIY underwater boat light installation: what you need to know

When it comes to choosing the perfect underwater lights for your boat, you’ll want to balance functionality, aesthetics, and durability. There are plenty of options out there, but finding the right product means paying attention to a few critical factors. First and foremost, consider the type of light. LED lights have become a popular option because they’re energy-efficient, long-lasting, and provide bright illumination without drawing too much power. However, for those who prefer a warmer, more natural glow, halogen lights are still a solid choice—just keep in mind that they require more energy to run.
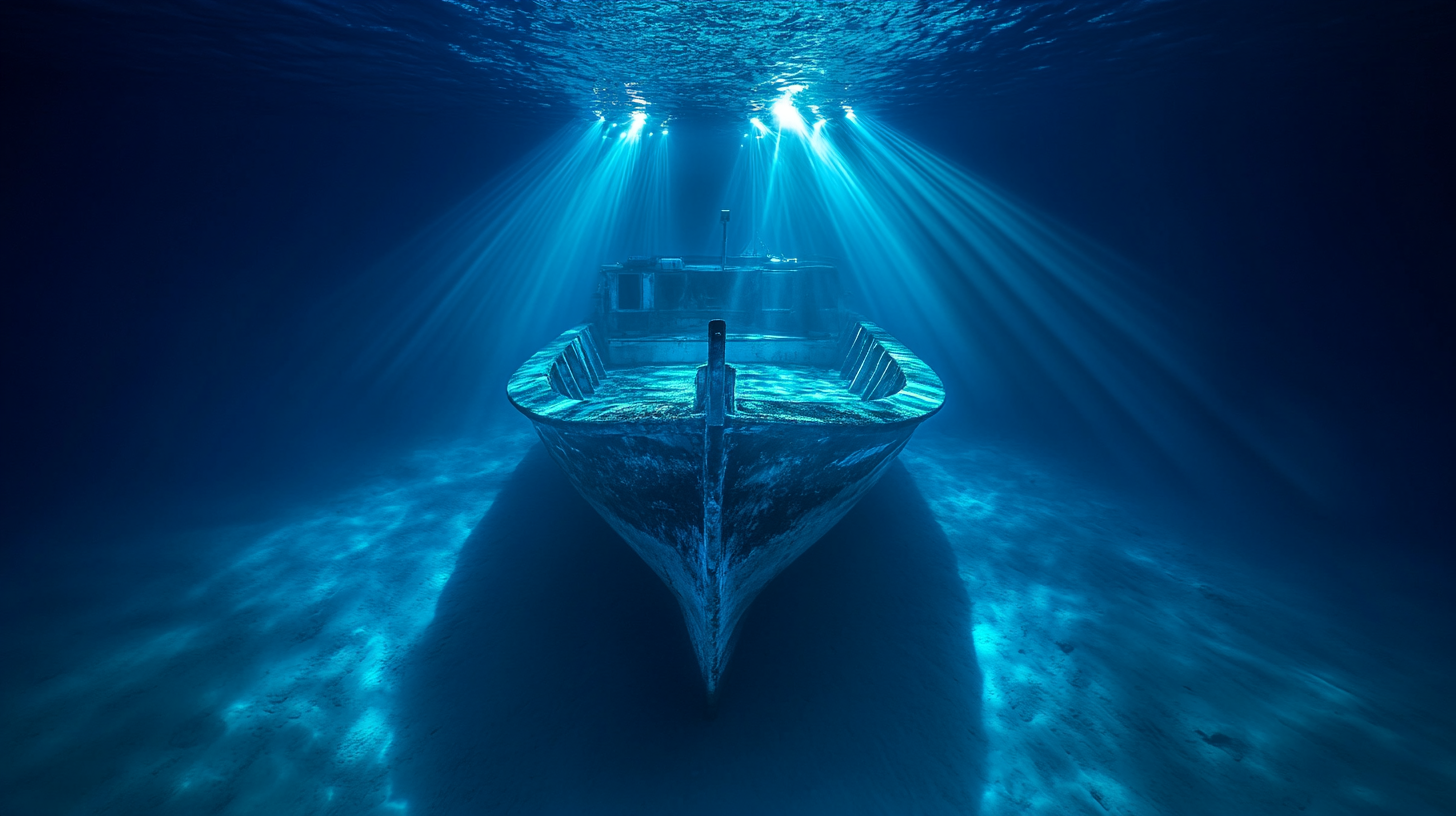
Another important factor to think about is the color of your underwater lights. Blue and green are the most common, with blue lights favored for deeper waters, while green lights tend to attract fish more effectively, making them a go-to for night fishing enthusiasts. Some lights even offer multi-color options if you can’t decide. The material of the lights is equally essential for longevity. Marine-grade stainless steel and bronze are both strong choices that can withstand corrosion from saltwater environments.
Lastly, think about your boat’s size and power system. Larger boats might require multiple lights, meaning you’ll need to understand how much voltage your system can handle. Installing a light system with too high a power demand can lead to electrical issues—a mistake that every DIY installation guide strongly warns against. Consider a set of lights that come with an easy-to-use control system so you have flexibility in controlling brightness and colors while you’re on the water.
Essential tools and materials for installation
Before diving into your DIY installation project, gathering the right set of tools and materials will set you up for success. Having everything at your fingertips ensures the process goes smoothly and minimizes the chance of frustration or delays. Here’s what you’ll need to prep before starting the installation of your underwater lights.
The most critical component is—of course—the lighting system itself. Make sure you’ve selected a kit that includes all the necessary light fixtures, power cables, and mounting hardware. Many marine lighting kits are designed with user-friendliness in mind, making them ideal for DIY installation. However, not all kits are created equal, so double-check that everything is included before busting out the toolbox.
Speaking of tools, your toolbox will be essential! For cutting and crimping wires, a simple wire stripper and crimping tool are non-negotiables. These allow you to manage and properly secure wiring connections. You’ll also need a tape measure to ensure accurate placements and spacing for the lights. It may seem basic, but nothing ruins a sleek lighting job like uneven or misaligned fixtures!
A good electric drill with stainless steel bits should be on hand to make precise holes for your lights. Since boats are typically made of fiberglass, wood, or metal, stainless steel bits will prevent damage to your vessel. Make sure you’re also using marine-grade sealant or epoxy to waterproof any holes drilled. Keeping water out of those holes is just as important as getting light underwater!
Don’t forget heat shrink tubing; this little item often gets overlooked but goes a long way in protecting your wiring from multiple elements, such as saltwater, moisture, and corrosion. And trust us—without proper insulation, those shiny new underwater lights could short-circuit more quickly than you’d think.
To complete the electrical setup, you may need waterproof connectors to ensure that none of the wiring is exposed to water. If your chosen light kit has a separate control system (whether for dimming or color-changing options), ensure you’re ready to install that as well, along with the necessary switches.
Lastly, depending on the type of lighting and installation area, you may need some sandpaper or a file to smooth out any rough edges after drilling. This reduces the risk of damaging the wiring or chipping the boat’s finish. And don’t forget those zip ties—keeping wires neatly bundled will make your DIY installation cleaner and dramatically lengthen the life of your boat lighting system.
Step-by-step guide to installing underwater lights
Now that you’ve picked out the perfect underwater lights and gathered all your tools, it’s time to dive into the installation process (pun intended!). This step-by-step guide will walk you through the process to ensure that your lights look great and last as long as possible. Whether you’re a seasoned DIYer or just handy with a wrench, following these instructions should make the project as smooth as a calm sea.
First, let’s start with the placement of the lights. Decide where you want to install your underwater lights; this largely depends on how you use your boat and the aesthetic you’re going for. Most commonly, underwater lights are installed on the transom—the flat back end of your boat. Mark the positions where the lights will go, ensuring that they’re evenly spaced and properly aligned. If you have multiple lights, use a tape measure to check the distance between them and make any necessary adjustments.
With your spots marked, it’s time to drill the necessary holes. Use your electric drill with a stainless steel bit (as we mentioned earlier) to create precise holes for both the wiring and mounting. Make sure to choose a bit that suits the size of your light fixtures and wiring. Once you’ve drilled the holes, carefully smooth out any jagged edges with sandpaper. Jagged edges can slice through wiring, which could short out your system or create electrical hazards, so take a moment to double-check.
Next, you’ll need to run the power cables through the drilled holes. This step is crucial for keeping the wires shielded from water exposure. Before pushing the cables through, wrap them with heat shrink tubing—this adds an extra layer of protection against water-induced corrosion. Once the wires are in place, a marine-grade sealant (don’t cheap out on this!) should be applied around the edges of each hole to fully waterproof the area. An improperly sealed hole is just asking for leaks that could lead to electrical shorts—or worse, damage to your boat.
Once the cables are fed through the holes and sealed, it’s time to connect the lights to your boat’s power system. Use waterproof connectors to attach the wires from the lights to your boat’s battery or electrical system. Make sure all connections are secure, and remember to use your crimping tool to ensure that the wiring stays tight and waterproofed. Loose, exposed wires not only pose a safety hazard, but they can also cause your lights to flicker or burn out prematurely. If your light kit includes a control panel for switching colors or adjusting brightness, hook those up as well according to the manufacturer’s instructions.
Before finalizing everything, it’s time for a quick but critical test run. Temporarily power up your system to check that all the lights turn on and function as intended. If they’re dim or not working, retrace your steps to ensure that all the connectors, wires, and switches are properly installed. It’s easier to troubleshoot potential electrical problems now than after everything’s sealed and set in place.
Once you’ve confirmed that your lights are functioning, it’s time to install the fixtures themselves. Most underwater lights include screws or bolts for mounting the fixtures directly onto your boat. Again, apply a marine-grade sealant around each screw or bolt to prevent water from seeping in. Tighten the screws, but don’t overdo it—you want them snug but not so tight that they crack the fiberglass or wood panels of your boat. After securing the lights, use zip ties to neatly organize and tuck away all electrical wires, ensuring that they won’t dangle in the water or get snagged on anything.
After everything is securely installed, give it another go! Power up the lights one more time, preferably at night (so you can really enjoy that glow). Stand back, admire your work, and get ready for plenty of compliments from fellow boaters. A well-executed DIY installation of underwater lights isn’t just functional—it turns heads, too!
Common mistakes to avoid during installation
One of the most common pitfalls is improper planning and measurement during the initial stages of the DIY installation. Several beginners fail to adequately measure their placement points, which leads to uneven or misaligned lights. It’s vital to use a tape measure and carefully plan the layout of your underwater lights before drilling any holes in your boat. Taking the time to confirm everything is symmetrically positioned will not only make the lights appear more professional but also prevent unnecessary re-drilling, which could weaken the boat structure.
A particularly damaging mistake is drilling without thoroughly checking your boat’s hull for obstructions. Rushing through this part can lead you to hit critical components, like fuel tanks or waterlines, leading to costly repairs. Always do a thorough inspection, and if your boat’s design is complex, referring to the manufacturer’s diagrams or contacting a professional may be the safest course. Another recommendation is to drill pilot holes first—that way you can confirm the positioning without committing to a larger hole.
Using subpar or improper sealant when you’re sealing your light fixtures or drilled holes can cause major issues over time. Not all sealants are made for marine conditions, and opting for a general-purpose sealant, rather than a marine-grade one, can lead to leaks and water damage. Keep in mind that a proper sealant is essential not only for preventing water from entering the boat but also for securing the long-term durability of your boat lighting system. Cheap or mismatched sealants could shrink, crack, or become brittle due to exposure to saltwater, temperature fluctuations, and sunlight—all potentially leading to electrical failures or corrosion.
Skipping on high-quality, insulated wiring is another frequent mistake. Many DIY enthusiasts may use standard, non-marine-grade wires that are vulnerable to corrosion when exposed to moisture and salt in a marine environment. This can lead to foul play and could even cause a short circuit. Always choose wiring that is specifically designed for a marine setting; it should be tinned copper, which helps resist corrosion over time. If non-tinned wire is used, moisture will eventually corrode it, leading to malfunctioning lights and potentially even electrical fires. Moreover, neglecting to use heat shrink tubing over wire connections can quicken the deterioration of your wiring system.
Improper wire routing is another error that plagues many DIY projects. Running wires where they can dangle or be exposed to the environment makes your installation vulnerable to wear and tear. Wires should always be neatly bundled and secured with zip ties, avoiding potential snagging points, sharp edges, or locations where the wires will face the elements directly. Additionally, it’s important to leave a little slack in the wiring for any necessary adjustments. Too-tight wiring can put strain on the connections and raise the chance of them snapping over time.
Perhaps one of the most frustrating mistakes occurs when people rush through the cable splicing process. Failing to crimp the connections properly or waterproof them may result in poor electrical contact and a lighting system that flickers or shuts off. Waterproof connectors are a must when attaching your boat’s power system to the lights—do not rely solely on electrical tape or standard connectors, as they’re unlikely to hold up in the harsh marine environment. In addition to connectors, marine-grade shrink wrap adds an extra layer of protection and should be used consistently.
It’s easy to overlook the importance of testing the system before final installation. Some individuals skip this crucial step, only to find out later that there was an issue with the wiring or the lights themselves. Always perform a ground test while the wiring and lights are still exposed to make sure everything is functioning correctly. If problems are discovered post-installation, it will take much more time and effort to troubleshoot and fix them.
Lastly, insufficient attention to the boat’s electrical system capacity can lead to major problems. Installing underwater lights that demand more power than your boat’s system can provide risks overloading circuits or draining your battery too quickly. Be sure to match the wattage and voltage of your lights to what your boat’s electrical system can safely handle. A quick consultation of your boat’s electrical manual, or even a discussion with an electrician, can help you avoid this pitfall.
By avoiding these common mistakes, you’ll ensure that your underwater lighting system functions smoothly, lasts longer, and remains free from potential hazards. Proper planning, the right tools, and quality materials are the cornerstones of every successful DIY installation.
Maintenance and safety tips for long-lasting performance
Once you’ve completed the installation of your underwater lights, the real secret to keeping them bright and functional for years to come lies in proper maintenance and following essential safety tips. Whether you’ve spent hours installing the perfect DIY boat lighting or just had a set professionally placed, routine care is non-negotiable if you want those lights to continue turning heads on every night voyage.
First things first: it’s important to understand that underwater environments, especially in saltwater, can be harsh on your boat lights. Corrosion, algae buildup, barnacles, and general wear-and-tear can compromise the lights’ look and function. As part of your regular maintenance, make it a habit to clean the lights thoroughly. A soft sponge or cloth with a non-abrasive marine cleaner is your best friend here. You can often find specialized boat light cleaning products that are designed to remove grime while being gentle on the housing material. While cleaning, avoid harsh chemicals like bleach or abrasive scourers; they can damage the surface of both LED and halogen lights, reducing their effectiveness and lifespan.
Algae and barnacle buildup not only make your lights look cloudy but can also dim their glow. Every few weeks—or after each long boating trip—check for this buildup, particularly in coastal or warm waters where marine life thrives. A plastic scraper can help remove these substances gently without damaging the lens or housing. Never use anything metallic, as it might scratch the lens and reduce the light output over time. The clearer the lens, the brighter and better your underwater lights will function.
In areas where saltwater is common, rinsing your lights with fresh water after every trip is a smart preventive measure. Salt crystals can build up and, in the worst-case scenario, cause corrosion around any exposed parts, including the screws and housing. If your boat is docked for long periods, it’s even more critical to flush the lights with fresh water regularly to avoid long-term exposure to salty conditions.
Apart from merely cleaning the lights, you need to periodically check for any signs of wear on the waterproof seals and fittings. The marine-grade sealant applied during the installation can degrade over time, especially when repeatedly exposed to water, sunlight, and fluctuating temperatures. Inspect the sealant for cracks, peeling, or gaps that can allow water to penetrate the fixture—a surefire way to end up with a short circuit or costly repairs. If any damaged areas are found, be proactive and reapply fresh marine-grade sealant to protect both the lights and your boat’s structure.
Another vital maintenance step is to examine the electrical connections regularly. Corrosion around the connectors is one of the most common issues boaters face, especially if you skipped on marine-grade components or heat shrink tubing during the installation. Even with the best materials, it’s critical to periodically inspect your wiring for any signs of corrosion, wear, or loose fittings. Over time, vibration from the boat’s movement can loosen connections, leaving wires exposed. Regularly tightening the connectors and replacing corroded or fraying wires will go a long way in preventing outages or electrical malfunctions.
Your boat’s lighting system also requires general electrical maintenance to ensure everything runs smoothly. A big part of this includes checking the voltage periodically. If you notice a dip in brightness or flickering lights, it could be a sign that your electrical system isn’t providing enough power. Battery maintenance is an important part of your routine, so make sure your battery is properly charged and capable of handling the voltage demands of the additional underwater lights. This is especially relevant if you’ve added other electrical accessories to your boat over time.
To keep your lights functioning optimally, make sure there’s routine testing. Once every few weeks, switch on the lights in a dark area and inspect for any flickering, dimming, or outright failure. Catching these issues early gives you time to correct them before they lead to more complex problems. If one light is malfunctioning but the others are working fine, investigate that specific light for wiring issues or internal failures. If every light is dim, the issue could be stemming from a power supply or battery problem.
Safety should always be a consideration, particularly when dealing with the electrical components of your boat lighting system. Anytime you’re inspecting or working on the lights, make sure the power is off to prevent shocks or other dangerous mishaps. If you’re unsure about any part of your wiring setup, don’t hesitate to consult with a marine electrician. Safety on the water starts with proper precautions! Remember, water and electricity do not mix, so never work on your lights while the boat is in the water.
One often-overlooked point of safety is ensuring that your lighting system doesn’t impair your ability to safely navigate at night. Overly bright or misdirected underwater lights can create glare, making it difficult to see other boats or markers in the water. Double-check that your lights are positioned in a way that enhances visibility without over-illuminating areas you need to monitor closely while steering. It’s recommended to dim or turn off underwater lights when approaching docks, busy marine zones, or when interacting with other boats to avoid dazzling fellow boaters.
To keep your underwater lights performing in peak condition for as long as possible, keep spare parts handy, including replacement bulbs, waterproof connectors, and extra sealant. If you’re venturing on a long trip or taking your boat to new waters, having these on hand can save you from an embarrassing lighting failure (especially when trying to impress onlookers with your sleek boat lighting setup). Tending to your DIY installation over time with proactive care is truly the key to ensuring that you shine on!