Automating your underwater pool lighting system
When it comes to enhancing the aesthetics and functionality of your pool area, understanding your pool lighting options is crucial. Having a clear idea of the available choices can make the process of automating your pool lighting system a whole lot smoother. There are several types of underwater lights that you can consider for your pool, each bringing its own set of advantages and unique features.
First on the list are halogen lights. These were once the go-to option for many pool owners because of their bright, warm glow and relatively low cost. However, they can be power-hungry and usually require more frequent bulb replacements compared to newer technologies.
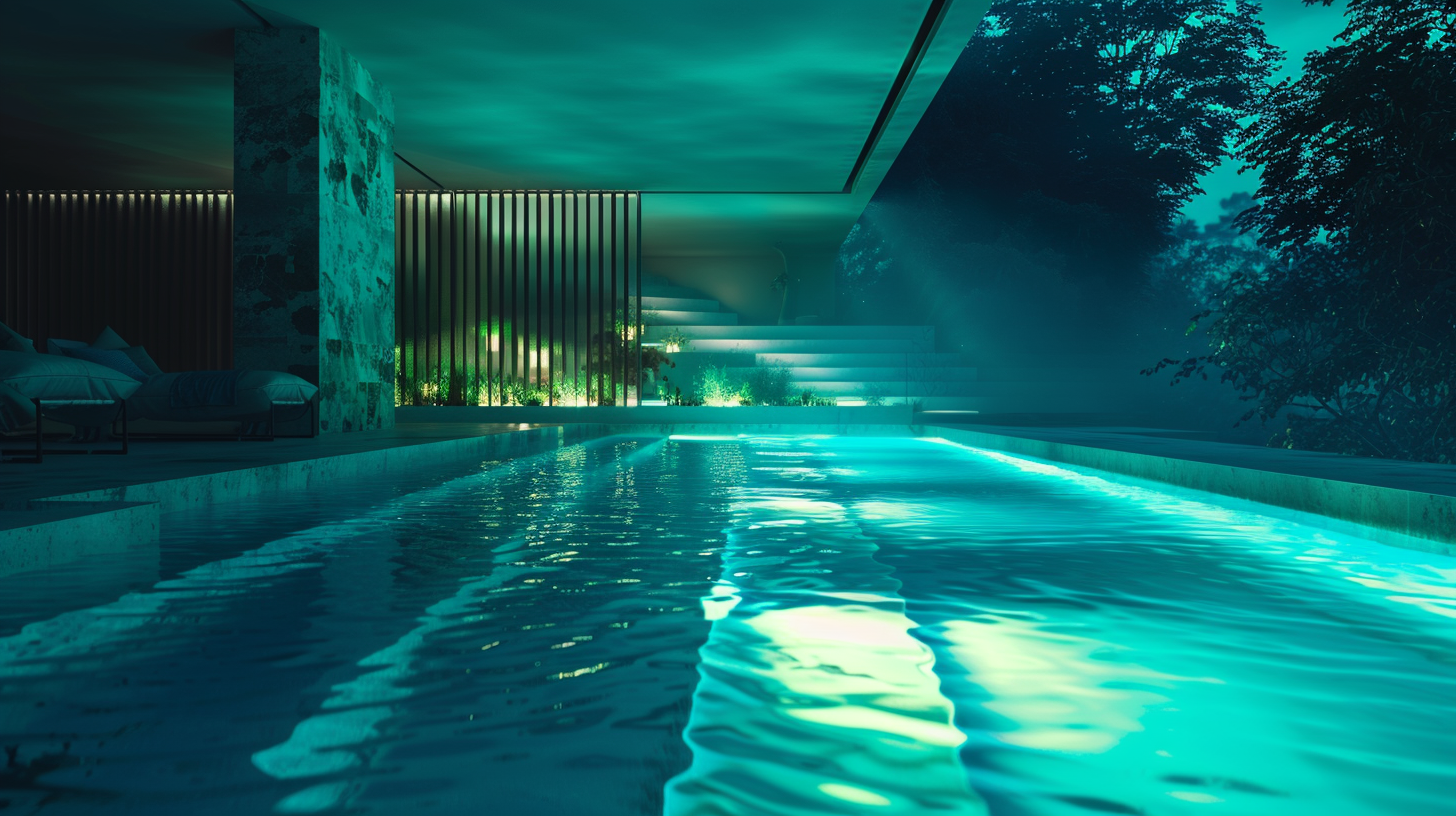
Next up are LED lights, which have quickly become the preferred option for many modern pools. LEDs offer incredible energy efficiency and longevity. They also come in a variety of colors and can be easily controlled and programmed for different lighting effects, which is perfect for those interested in automating their pool lighting system. Imagine being able to set the mood with the touch of a button—from vibrant party vibes to a serene evening glow.
There are also fiber optic pool lights, which are less common but offer some advantages. The light source is housed outside the pool, which means you don’t have to drain the pool to replace bulbs. While fiber optic lights can be a bit pricey, their safety features make them worth considering.
Lastly, we have solar-powered pool lights. While not traditionally used for pool lighting due to their lower brightness, innovations in solar technology are making them a more viable option for those looking to go green.
Understanding these options can help you make an informed decision and ensure your pool lighting system not only meets your design aspirations but also complements your lifestyle needs. Whether you go for the classic appeal of halogen bulbs or the modern flair of LEDs, automating your underwater pool lighting can elevate your swimming experience to new heights.
Components of an automated lighting system
An automated lighting system for your pool involves several key components, each playing an integral role in delivering a seamless and delightful underwater illumination experience. Understanding these components is essential for the successful implementation and smooth operation of your automated pool lighting system.
First and foremost, you’ll need a robust and reliable pool lighting controller. This device acts as the brain of your system, allowing you to manage and automate your pool lights effortlessly. Most modern controllers come with a user-friendly interface and can be operated via a smartphone app, giving you the capability to customize your lighting settings from virtually anywhere. Look for a controller that offers compatibility with both iOS and Android devices to ensure maximum convenience.
The next critical component is the transformer. Pool lights often run on a lower voltage than standard household electricity, typically 12V or 24V for safety reasons. The transformer steps down your standard 120V home power supply to the appropriate voltage to run your underwater lights safely. When selecting a transformer, make sure it matches the total wattage requirements of your pool lights to avoid any electrical issues.
Complementing these essential items are the underwater light fixtures themselves. As discussed previously, you have options such as halogen, LED, and fiber optic lights. LED fixtures are particularly popular due to their energy efficiency, longevity, and vibrant color options. They can be easily integrated into an automated system and can even be configured to display stunning light shows that alternate colors and patterns, adding a dynamic element to your pool area.
An often-overlooked but crucial component is the cabling and connectors. High-quality, waterproof cabling ensures that your lighting system remains functional and safe even in a wet environment. The connectors should also be specifically designed for underwater use, providing a secure and moisture-resistant connection between your lights and power source. Opting for subpar materials here can lead to malfunctions and frequent maintenance issues.
Lastly, don’t forget the importance of a waterproof junction box. This box houses the electrical connections and is essential for keeping moisture out, which is vital for the longevity and safety of your automated lighting system. Ensure that the junction box is rated for underwater use and is installed as per industry standards to avoid any electrical hazards.
By understanding and carefully selecting these components, you’ll be well on your way to automating your underwater pool lighting system effectively. Each element, from the controller to the waterproof junction box, plays a vital role in ensuring your pool is not only breathtakingly illuminated but also safe and efficient to operate.
Installation and setup guide
Before diving into the installation phase, it’s important to gather all the necessary tools and materials to ensure the process runs smoothly. In addition to your pool lighting components like lights, controller, transformers, and cabling, you’ll also need basic tools such as a screwdriver, wire strippers, electrical tape, and a voltage tester. Safety glasses and gloves are also recommended when dealing with electrical components.
Start by turning off the power to your pool area at the main circuit breaker. This step is crucial for your safety, and it’s always better to be cautious when dealing with electricity near water. After ensuring the power is off, locate the area where you intend to place the lighting controller. Ideally, it should be in a sheltered but accessible location near your pool, within the range of your Wi-Fi signal if it’s app-operated.
Once you’ve decided on a location for the controller, mount it according to the manufacturer’s instructions. Most controllers come with a mounting bracket and detailed guidelines. Attach the controller securely to the surface and ensure it is level. If it’s a smart controller, follow the setup steps to connect it to your home network, usually through a dedicated app.
Next, it’s time to install the transformer. Find a suitable spot near your controller to mount the transformer. This should also be a dry, sheltered area to protect it from the elements. Using the appropriate screws, securely attach the transformer. Connect the power supply wires to the transformer according to the wiring diagram provided in the installation manual. Double-check all connections to ensure everything is tight and secure.
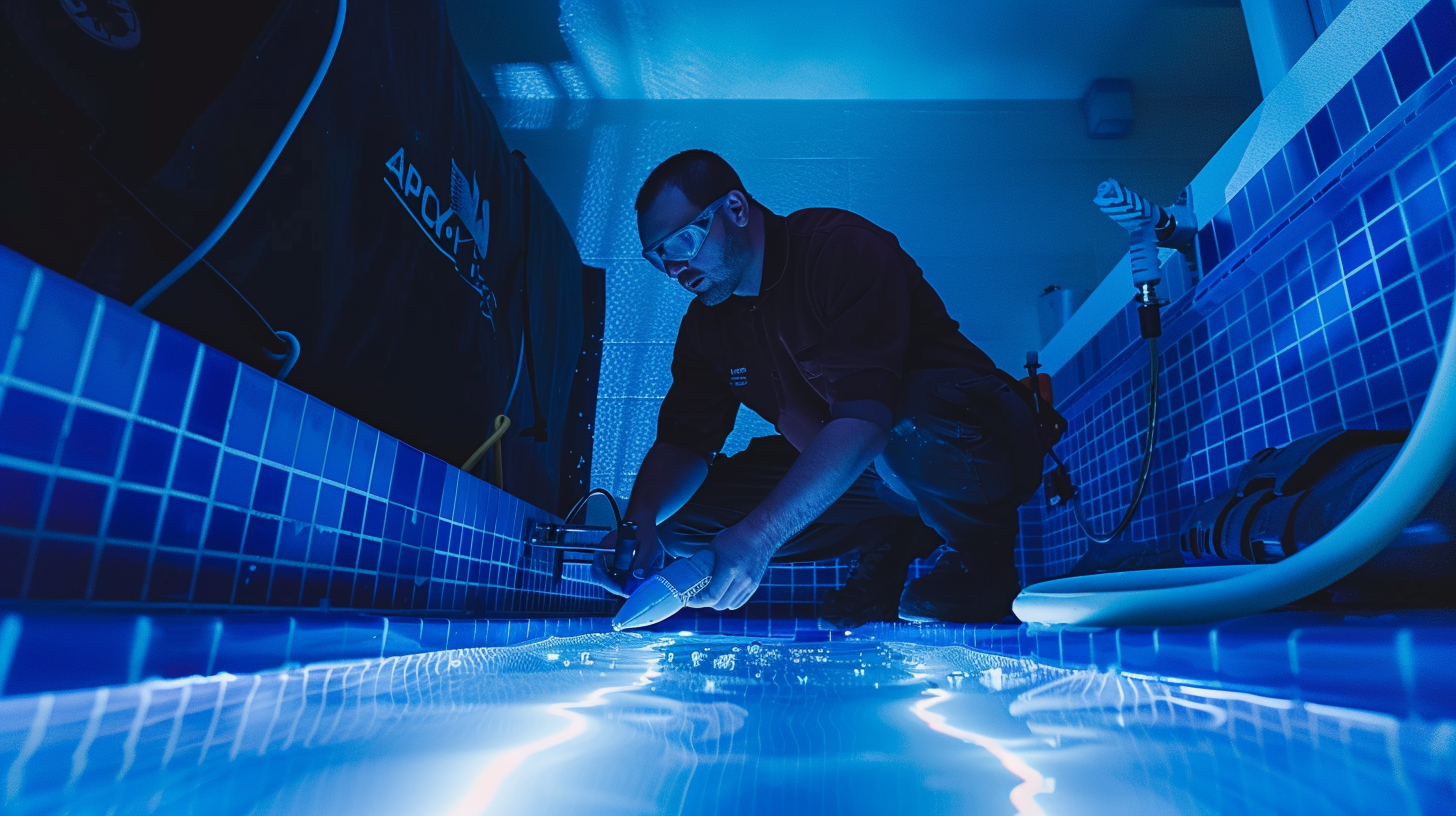
Now, it’s time to move on to installing the underwater light fixtures. Decide on the spacing and placement for your lights based on your pool design and personal preference. Mark these locations clearly. If you’re replacing existing lights, the process will be more straightforward as you will utilize the current openings. For new installations, consider hiring a professional to drill the necessary holes and install the light niches, as this step can be complicated.
Once the light niches are ready, run the waterproof cabling from the transformer location to each of the light fixtures. Ensure you have enough slack to make any necessary adjustments. Slip the cables through conduit pipes to protect them from water exposure and physical damage. Securely fasten the cables to the light fixtures using waterproof connectors and then mount the fixtures into the niches according to the manufacturer’s instructions.
With the lights in place, connect the cables to your waterproof junction box. The junction box should be installed in a dry, easily accessible area near the pool. Open the box and carefully connect the wires from your light fixtures to the corresponding terminals inside the box, following the wiring diagram to ensure correct connections. Use waterproof wire nuts to seal the connections and protect them from moisture.
Finally, wire the junction box to the transformer and connect the transformer to the lighting controller. Recheck all connections and ensure everything is properly secured and insulated. Once you’re confident that all wires are correctly connected and safe, restore power at the main circuit breaker.
Test your pool lighting system by turning on the controller and cycling through the various settings and modes. If everything is working correctly, you should start to see your underwater lights illuminate beautifully. If any issues arise, double-check your connections or consult the troubleshooting section in the manual. If problems persist, don’t hesitate to contact a professional electrician for assistance.
By following these steps carefully and methodically, you’ll bring your dream of automating your pool lighting system to life, creating an enchanting and customizable ambient setting that enhances every swim or poolside gathering.
Programming and customizing lighting schedules
Once you have your automated pool lighting system installed, the real magic begins with the programming and customization of your lighting schedules. This is where technology meets creativity, allowing you to set the perfect ambiance for any occasion at the touch of a button. Most modern lighting controllers offer easy-to-use interfaces, often accessible directly from your smartphone or tablet, empowering you to create a variety of lighting schemes tailored to your preferences.
Start by downloading the dedicated app that accompanies your pool lighting controller. Whether you’re using an iOS or Android device, the app usually comes with a user-friendly interface designed to make the setup a breeze. Begin by connecting the app to your lighting controller, following the specific guidelines provided in the manual. This may involve entering a unique code or scanning a QR code to sync the devices.
After establishing a connection, you can dive into setting up the lighting schedules. Most apps will have a “Schedules” or “Timers” section where you can specify when you want the lights to turn on and off. Whether you want the lights to gradually turn on at dusk and switch off at midnight or prefer a custom schedule for special events, the options are virtually limitless. Simply select the days and times that suit your needs and save the schedule.
| Function | Steps | Tips |
|---|---|---|
| Basic On/Off Scheduling | Select “Schedules” in the app > Set on/off times > Save | Consider sunset to midnight for everyday use |
| Color Customization | Go to “Color Settings” > Choose color > Save | Use cool colors for relaxation, vibrant ones for parties |
| Dynamic Light Shows | Select “Light Shows” > Choose a pre-set show or customize > Save | Ideal for festive seasons or pool parties |
| Remote Access | Enable remote access in settings > Confirm via email/phone | Control your pool lights when you’re away from home |
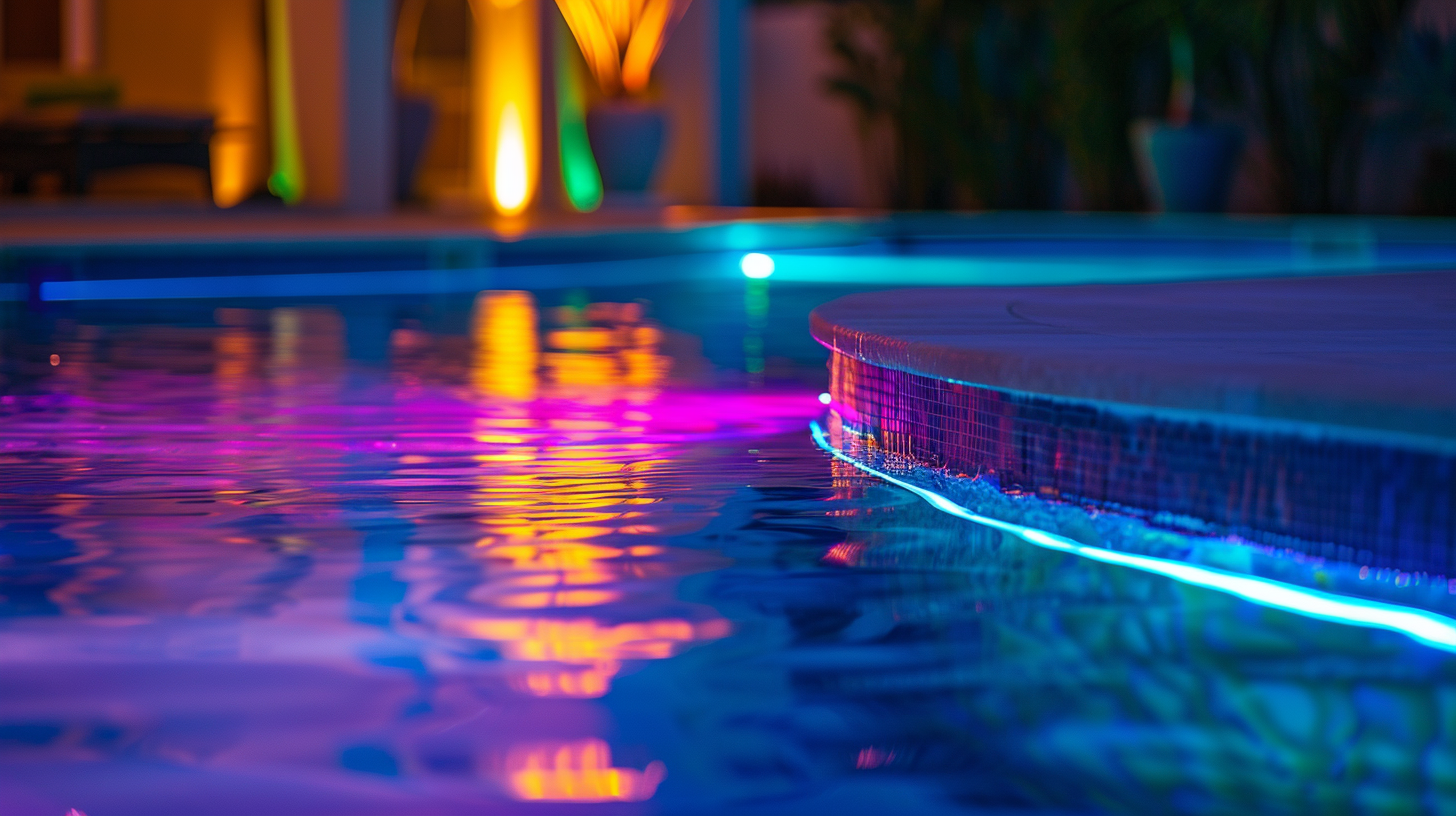
Now, let’s explore color customization. Most advanced controllers allow you to select from a wide spectrum of colors. Navigate to the “Color” or “Light Effects” section of your app. From here, you can choose from various preset colors or use a color wheel to mix your bespoke shade. For a calming evening swim, you might opt for cool blues or greens. Alternatively, for an animated pool party, vibrant reds, purples, and multicolor sequences can set the right tone.
In terms of advanced features, many systems offer dynamic light shows. These are pre-programmed sequences that can alternate colors, create patterns, and even sync to music. To activate these, go to the “Light Shows” section, select your desired effect, and save the settings. These light shows are perfect for special occasions like birthdays, holidays, or any time you want to impress your guests with a dazzling light display.
An essential part of automating your pool lighting system is enabling remote access. This feature allows you to control your lighting from anywhere in the world, provided you have an internet connection. Enable this by navigating to the remote access settings in your app and confirming your login details via email or mobile phone. This is particularly useful if you travel frequently and want to ensure your pool lights adhere to your set schedules, or if you simply want to turn on the lights before you come home.
The ability to program and customize your pool lighting schedules not only enhances the visual appeal of your pool but also adds layers of convenience and functionality to your swimming experience. Experiment with different settings to discover what works best for you, and enjoy the stunning results that modern pool lighting technology can offer.
Maintenance and troubleshooting tips
Even the best-automated underwater pool lighting systems require regular maintenance to ensure they operate efficiently and safely. Whether you have halogen, LED, or fiber optic lights, keeping everything in top condition will prolong the life of your lighting system and prevent unexpected failures.
Firstly, make it a habit to inspect the lights regularly. This means checking for any signs of wear and tear, such as cracked lenses, loose connections, or water intrusion. If you notice moisture inside the light fixture, it’s imperative to address it immediately to prevent more severe damage. Sometimes, simply tightening the screws or replacing a gasket can solve the problem.
Another key aspect of maintenance is keeping the light fixtures clean. Over time, debris, algae, and calcium build-up can obscure the lights and diminish their brightness. Using a soft brush, clean the light covers during your routine pool maintenance. Avoid harsh chemicals that could damage the fixtures; mild soapy water usually does the trick.
For those with LED lights, the great news is that these fixtures require less frequent maintenance compared to traditional halogen bulbs. However, it’s still important to check the transformer and controller periodically for any signs of overheating or malfunction. Ventilate the area around these components to prevent heat build-up, which can shorten their lifespan.
Automating your pool lighting system is fantastic, but what happens if the automation fails? Understanding some basic troubleshooting tips can save you time and possibly money. If your lights are not responding to the controller, start by checking the power supply to ensure that everything is plugged in and receiving power. This might seem obvious, but it’s often the most straightforward solutions that are overlooked.
If power is not the issue, check the connections between the controller, transformer, and light fixtures. Loose or corroded connections can interrupt the circuit, causing the lights to malfunction. Use a multimeter to check the continuity of the wires, ensuring that there are no breaks in the circuit.
Sometime, the issue might lie with the software or app used to control the lighting system. If the lights are not following the programmed schedules, try resetting the controller and reinstalling the app. Make sure your device’s firmware is up-to-date for seamless performance. If the problem persists, consult the manufacturer’s support for specific troubleshooting steps.
For fiber optic systems, it’s crucial to keep the light source dry and free of dust. Regularly cleaning the fan and filters can improve airflow and prevent overheating. If the lights appear dim or flickering, it might be time to replace the fiber optic illuminator bulb, which generally has a lifespan of a few thousand hours.
Solar-powered lights are lower maintenance since they don’t rely on external electrical connections. However, ensure the solar panels are free from dirt and debris to maximize their efficiency. If a light stops working, check the rechargeable battery as it may need replacing after several seasons of use.
A common issue across all types of pool lighting is underwater cabling. Always ensure the cables are intact and properly insulated. Damaged or worn-out cables can lead to electrical faults, which can be hazardous. Inspect the cables periodically and replace them if any damage is detected.
By staying proactive with regular maintenance and arming yourself with troubleshooting tips, you can keep your automated underwater pool lighting system in excellent condition. Not only will this enhance the visual appeal of your pool, but it will also ensure a safe and enjoyable swimming environment.