Exploring different installation methods for underwater boat lights
When exploring the various types of underwater boat lights, it’s easy to become fascinated by the diverse options available. Whether you’re aiming to enhance your boat’s aesthetics or improve nighttime visibility, choosing the right type of light is crucial. Let’s dive into the main categories you’ll encounter on the market today and highlight how each type suits different installation methods and boating preferences.
First, there are LED underwater lights, the most popular option for modern boaters due to their energy efficiency, brightness, and longevity. These lights come in various colors and provide dazzling illumination beneath the surface. They are ideal for frequent boaters who value both durability and aesthetics. On top of that, their low-energy consumption makes them a go-to choice for long nights on the water, minimizing drain on your boat’s power system.
Other designs to consider are halogen lights, which were once the go-to choice but have largely been outpaced by LEDs. However, don’t discount halogen entirely — they still offer a bright, warm glow that some boaters prefer, although they require more power and can get hot to the touch. For those interested in cost-effective and simple installation, halogen lights work well, but might not be the best for extended trips or high-performance needs.
There are also xenon underwater lights, known for their intense brightness, which may be preferred for larger vessels or those navigating deeper waters. While these lights might be more expensive and require slightly more involved installation methods, they provide exceptional underwater visibility, allowing you to scan the water easily during night operations or while fishing.
If you’re interested in a blend of functionality and aesthetics, RGB color-changing lights are a hit. These can shift between multiple colors depending on your preference, making a fun and visually striking option while still offering decent illumination. They’re perfect for parties on the water or to draw fish near your boat when needed, thanks to their vibrant output. However, they may require more personalized wiring considerations based on the features you choose.
No matter which type you pick, always consider how easy it will be to install and maintain the lights. Some underwater lights, especially those mounted through-hull or transom, will require more expertise, while surface-mounted options can be simpler for novice boaters to handle themselves. By weighing the advantages of each option, boaters can find the perfect lighting setup that fits their needs, whether they prioritize practicality or ambiance for those evening adventures.
Direct attachment methods
When it comes to installing underwater boat lights, direct attachment methods are one of the most straightforward and popular options. This installation method is especially favored by boaters who are looking for a relatively quick setup that doesn’t require drilling through the hull or making significant structural modifications to their vessels. The beauty of direct attachment is its simplicity — and it’s also reversible, which means if you ever want to upgrade or swap out the lights, you can do so without much hassle.
The most common technique for direct attachment is using adhesive or screws to mount the lights directly onto the transom or the underside of the boat’s hull. These mounts are often designed for surface lighting, where the beam can spread outward into the water, creating that illuminating glow we all love while offering functional lighting at night. While some adhesives are designed for underwater durability and provide a clean, no-tool-required setup, more permanent installations will call for stainless steel screws to ensure a secure fit that can handle several seasons on the water.
If you’re opting for the adhesive method, be sure to use marine-grade sealants that can withstand exposure to saltwater, UV rays, and other challenging marine conditions. Sealant-based installations can still offer significant holding power, especially for LED lights, which are typically lighter in weight compared to older halogen systems. However, always make sure the surface is clean and free of any algae or debris before applying the adhesive, as a smooth surface will ensure better attachment and prevent the lights from falling off prematurely.
Another handy direct attachment method is through magnetic mounts, which have gained some attention recently. These offer a no-drill solution favored by those hesitant about puncturing their hull. It works best on smaller boats, and placement flexibility is superb – you can often reposition the lights without hassle. However, bear in mind that strong magnets are necessary, and they must be specifically designed for the marine environment to resist corrosion and weakening over time.
One of the crucial things to remember when using direct attachment methods is to regularly check the mounts after several trips out on the water. Whether you’re hitting saltwater waves on a weekend fishing adventure or cruising smoothly along a lake, the water can be tough on even the strongest adhesives and screws, especially if your lights get bumped by debris or marine growth. A quick check of your lights during regular boat maintenance will ensure they remain securely installed and functional.
Considering the ease of direct attachment methods, boaters — whether seasoned or new to underwater lights and the finer details of marine installation methods — can often manage the setup on their own. With fewer tools required and minimal structural impact, this method is a fantastic way to get creative with your underwater illumination while still ensuring a sturdy, reliable installation that will light up your aquatic excursions.
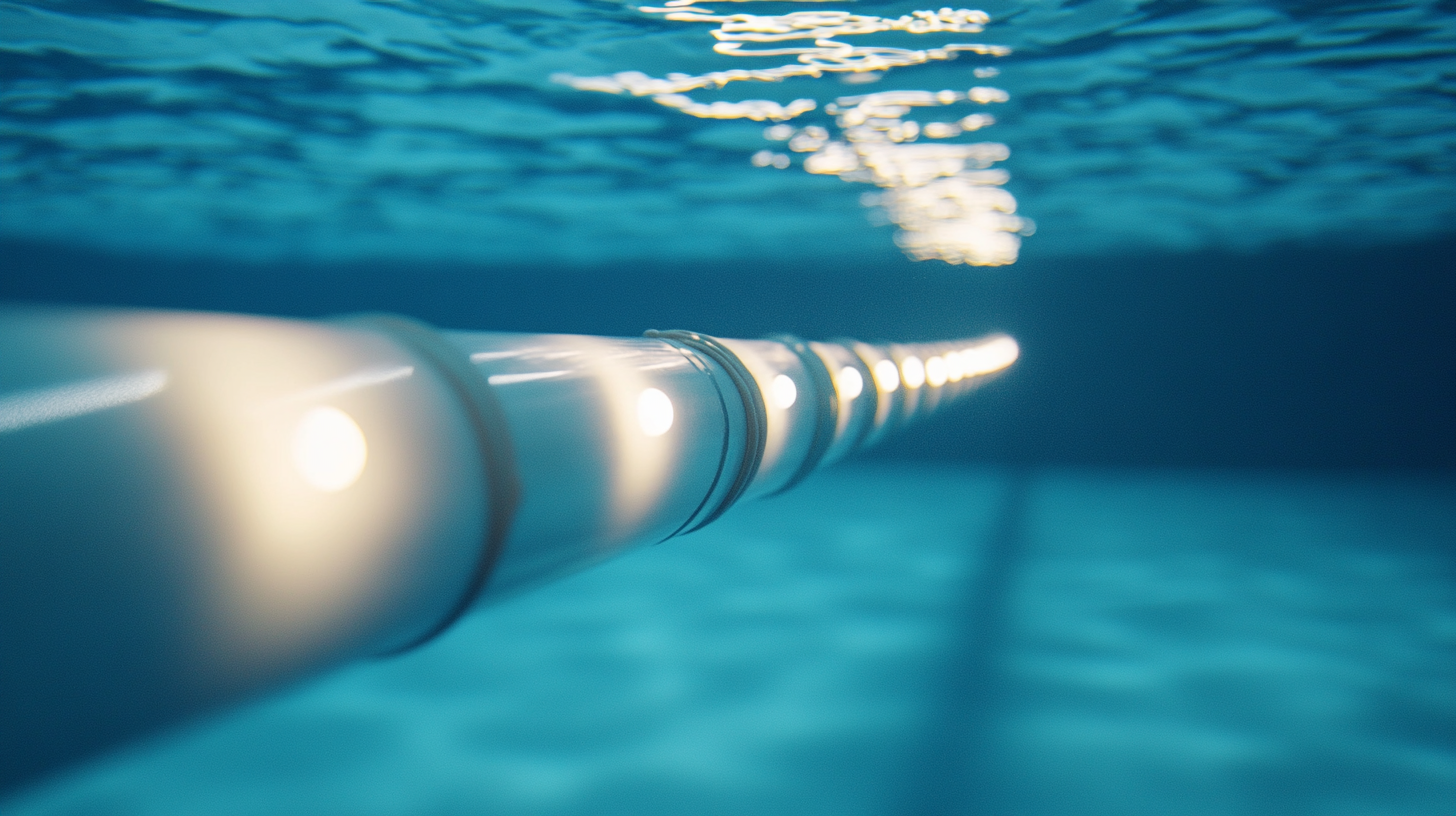
Through-hull installations
Through-hull installations are one of the more permanent and complex methods of installing underwater lights, but their benefits can be well worth the investment for serious boaters. As the name suggests, this method involves drilling a hole directly through the hull of your boat to mount the light, with the watertight fixture placed on the exterior of the hull while the wiring and controls remain inside. Understandably, this installation method requires a certain level of expertise and precision, as any mistake could compromise the integrity of your hull. However, when done correctly, the light not only looks seamless but also provides an incredibly strong and reliable source of illumination from beneath your vessel.
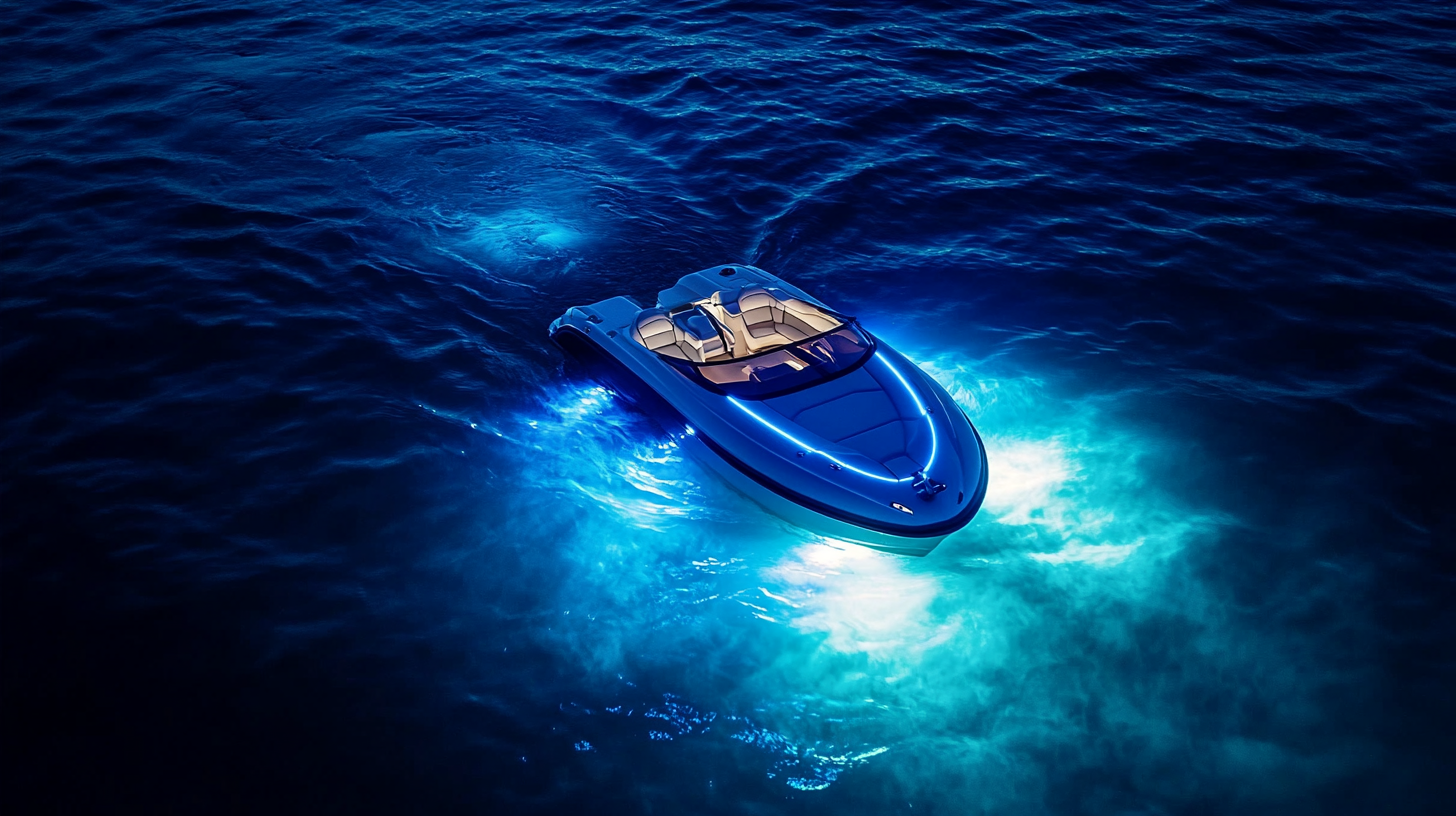
The main advantage of a through-hull installation is that it allows for a clean, unobtrusive look. Unlike surface-mounted lights that are affixed to the outside of the hull, these lights are flush with the surface, which reduces drag and gives your boat a sleeker profile. Additionally, because through-hull lights sit below the waterline, they tend to deliver much brighter and broader coverage, making them ideal for illuminating deeper waters during night operations or for those wanting to create that signature ‘halo’ effect beneath their boat. Whether you’re anchoring in remote locations or simply enjoying an evening cruise, this method delivers powerful, atmospheric lighting that stands out from standard boating setups.
However, there are several key considerations to keep in mind before opting for a through-hull setup. The installation requires drilling precision and proper sealing to prevent water intrusion, a task that is often best left to professionals unless you’re a very experienced DIY boater. Any improperly installed through-hull light could lead to leaks or compromise the structural integrity of your boat over time. Quality marine-grade materials are an absolute must as these lights will be exposed to high levels of moisture, salt, and fluctuating temperatures. Using sub-par materials, or skimping on proper sealing, can lead to corrosion, which may cause significant damage to your hull.
In terms of boating tips, many opt for through-hull installations because of their durability. While they cost more upfront — not just for the lights themselves but also for the labor and tools required during installation — they are generally a long-lasting solution. Unlike surface-mounted or adhesive-attached lights, which may need more frequent replacement or maintenance due to exposure and surface-level vulnerabilities, through-hull lights generally experience fewer issues. Additionally, because they’re housed within the hull’s thickness, they are less prone to damage from debris or accidental impacts while docking.
This installation method is ideal for larger or more performance-oriented vessels that require superior underwater visibility. Fishermen, in particular, find through-hull lights invaluable for attracting fish at night by lighting the area directly below the boat. However, it’s not solely for utility; aesthetically, this type of installation offers unmatched elegance. The light seems to emerge directly from the boat, creating a sharp and uninterrupted underwater glow that enhances the overall visual appeal whether you’re docked, sailing, or just showing off your watercraft under starlit skies.
As you’re exploring through-hull installations, remember that the correct positioning of the lights is crucial. If they are installed too close to the keel or the transom, they might not offer the spread or depth of glow you’re aiming for. Consulting with an experienced marine electrician can help you better understand the optimal placement for your specific boat model, taking into account factors like hull design and size. Additionally, some boat owners select multiple through-hull lights to create even light distribution, particularly on larger vessels, ensuring that the lighting doesn’t look patchy or concentrated in any one area.
If you’re the kind of boater who enjoys a slick, permanent installation method with high-powered underwater lights that won’t let you down even in harsher waters, through-hull installations could be an ideal choice. Yes, a deeper level of commitment is required, both in terms of planning and execution, but the long-term payoff in terms of durability, brightness, and visual neatness might make it exactly the right option for your vessel, whether for exploration or pure aesthetic enjoyment.
Flush-mount VS surface-mount options
A key decision you’ll need to make when choosing underwater lights is whether to go for a flush-mount or surface-mount installation. Both approaches have their pros and cons, and their suitability largely depends on your boat type, where you plan to install the lights, and how much maintenance you’re ready to take on to preserve the system’s longevity.
The flush-mount option is praised for its low-profile, sleek design which, as the name suggests, allows the light fixture to sit flush with the hull or transom of the boat. This method is often coupled with through-hull installations, where a hole is drilled through the boat’s hull for the light to be inserted, leaving very little of the light exposed on the exterior. This not only gives the boat a more seamless and polished look but also helps reduce drag, making it an excellent choice for high-performance boats where hydrodynamics are a priority. Plus, because flush-mount lights don’t protrude, they are less likely to get damaged by floating debris or during docking, reducing the need for frequent maintenance checks.
On the downside, flush-mount installations are generally more complex and require a higher level of expertise to ensure proper sealing and positioning to avoid water intrusion. This is a long-term commitment as the lights are semi-permanent — meaning once installed, you won’t be able to change the position easily. As a result, many boaters choose to have them installed by professionals rather than attempting a DIY job, especially since any mistake in alignment or sealing could cause serious issues down the road. Additionally, flush-mount installations often involve more expensive upfront costs, both in terms of equipment and labor for the installation itself.
In contrast, surface-mount underwater lights are far simpler to install and maintain, making them a popular option for casual boaters or those who are less experienced with marine electrical work. Instead of drilling through the hull, these lights are affixed directly onto the boat’s surface through screws or adhesives. This installation method is easier to manage and can even be a DIY project for those with basic tools and mechanical skills. It can be completed relatively quickly and still offers a powerful illumination effect. Given the minimal structural impacts, surface-mount installations also make for easy upgrades as newer models of underwater lights become available.
Surface-mount lights, however, protrude slightly from the hull, which may contribute to additional drag, albeit usually a negligible amount, especially on slower-moving or recreational vessels. More significantly, because the lights extend from the boat’s surface, they are more susceptible to physical damage from obstacles, docking, or marine life like barnacles. Regular maintenance is essential to ensure longevity, as marine growth and water conditions can degrade components over time, necessitating periodic cleaning and checks for loose screws or wear and tear in adhesive products.
Another point to consider when deciding between these two installation methods is the extent of the light spread you’re hoping to achieve. Flush-mount lights, due to their embedded design, typically project light more evenly and create a broader, more intense glow beneath the boat. This makes them an excellent choice for illumination during night fishing or for those seeking to create an impressive visual effect when the boat is anchored. Surface-mount lights, while still sufficiently bright, may have a more concentrated spread, illuminating a smaller area depending on placement and the shape of the fixture. This is a key factor for anyone focused on maximizing the aesthetic appeal or functional use of their underwater lights.
Lastly, consider the long-term maintenance implications of each option. If you’re frequently navigating challenging waters with lots of floating vegetation or debris, flush-mount designs might save you repair work in the long run. In contrast, surface-mount lights may need more frequent attention to ensure their outward-facing components remain functional and securely attached to the hull.
In sum, the decision between flush-mount and surface-mount installations comes down to your boating habits, performance needs, and how much effort you wish to invest in the initial installation and subsequent upkeep. For those seeking a more refined look and greater light diffusion, flush mounts offer fantastic benefits but require more planning and a higher skill level for installation. Meanwhile, surface mounts are an affordable, straightforward solution that works well for novice boaters or those who prefer flexibility and easy maintenance in their underwater lighting solutions.
Here’s a quick comparison table to help you weigh the specifics:
| Flush-Mount | Surface-Mount | |
|---|---|---|
| Installation Complexity | More complex; usually requires professional assistance. | Simple DIY-friendly; easy to mount with screws or adhesives. |
| Drag/Risk of Damage | Low drag; unlikely to get damaged by external impacts. | Minimal drag but more susceptible to damage from docking or debris. |
| Maintenance Needs | Less frequent; stays well-protected within the hull. | Requires periodic checks for integrity and potential damage. |
| Lighting Distribution | Offers broad and even light spread, excellent for deep illumination. | Provides bright but more concentrated lighting, may cover less area. |
| Cost | Higher upfront cost due to more complex installation. | Lower cost for parts and setup; more budget-friendly. |
By taking these factors into account, you’ll be able to select the underwater light installation method that best aligns with your boating needs and installation expertise.
Wiring and power considerations
When installing underwater boat lights, wiring and power considerations are just as crucial as the lights themselves. Whether you’re using LED, halogen, or xenon lights, ensuring a stable, reliable power supply is essential for both performance and safety. Improper wiring can lead to a variety of issues, from lights flickering or failing in the middle of a nighttime voyage, to more serious dangers like power shorts or fire hazards. Fortunately, planning out your power setup correctly doesn’t have to be intimidating—just requires careful attention and, in some cases, professional help.
One of the most important considerations when it comes to powering your underwater lights is calculating the total power draw of your system. LED lights, for example, are incredibly energy-efficient and will typically require less power than older technologies like halogen or xenon. This means LEDs are less likely to drain your boat’s batteries, but it’s still important to tally up their combined wattage if you plan to use multiple lights. Most small to midsize boats can comfortably run LED systems without needing a major upgrade to the electrical infrastructure, but for larger vessels or more power-hungry lights, you may need to install a secondary battery or a more robust power management system.
Another key element you’ll want to address is whether your lights are compatible with your existing electrical system’s voltage. Most boats utilize 12V or 24V systems, and while many underwater light manufacturers design their systems to be compatible with both, it’s not always guaranteed. Double-check to ensure that the voltage requirements of your new lights align with your system, or you may be dealing with electrical issues from day one. If required, a voltage step-down or step-up converter can be installed as part of your setup to match your boat’s power system with your chosen lights.
When it comes to the physical installation of the wiring, it’s imperative that all wiring is properly sealed and protected from water exposure. Marine environments are unforgiving, and saltwater in particular is extremely corrosive to electrical connections. Using marine-grade, tinned copper wiring for your underwater lights is highly recommended—it’s specifically designed to resist corrosion and offers better durability in moist conditions. Additionally, using heat-shrink tubing for all connections and crimping them securely will give an added layer of protection against water intrusion, preventing electrical shorts or connection breaks.
Choosing the right circuit breaker or fuse for your lights is yet another important step. Each underwater light must be connected to a fuse or breaker that matches its amperage requirements. This is a critical safety measure, as the proper fuse ensures that your electrical system remains protected in case of an overload. A blown fuse will cut power to the circuit before causing damage, preventing potential fire hazards or other malfunctions. Many boaters setting up underwater lights opt to dedicate a separate breaker for the lighting system, especially if they are planning to install several lights across their vessel.
Lastly, for those who want more control over their lights (especially if you’re installing RGB color-changing lights or lights with multiple settings), consider adding a dedicated light control module. These modules allow you to adjust light intensity, switch between colors (for RGB systems), or even toggle between flashing patterns from the cockpit. Most units are programmable through a standard switch or even a remote, offering additional ease of use. Plus, it’s worth noting that some controllers can sync with your boat’s GPS or fishfinder, adding an extra layer of integration into your boating experience.
Wrapping it all up, the wiring and power consideration phase is an integral part of any underwater light installation. Getting these details right from the beginning not only ensures safe operation but also ensures that your boating experience will be illuminated every time you venture out after dark. While the temptation might be to focus solely on the lights themselves, remember that quality connections, proper power management, and careful product selection will go a long way toward a reliable and long-lasting installation.