DIY underwater boat light projects to try at home

When it comes to enhancing the aquatic ambiance around your boat or dock, understanding underwater lighting is crucial for any DIY enthusiast looking to dive into some exciting home improvement projects. At the core of these DIY projects, the focus is on creating an alluring illumination that is not only practical for nighttime visibility but also aesthetically pleasing.
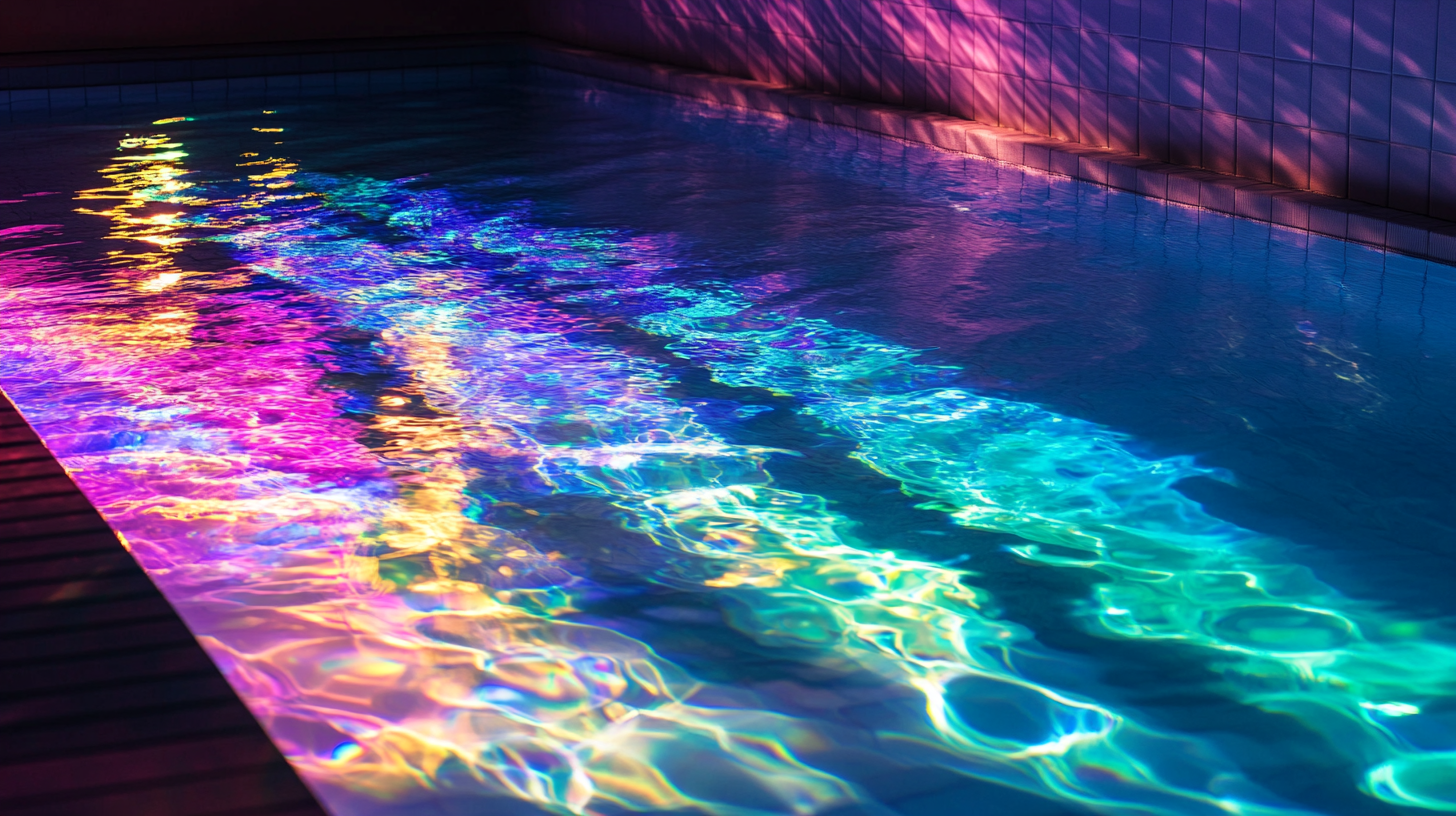
Underwater lights have the magical ability to transform the environment, casting a mesmerizing glow across the water that can attract marine life and set the mood for an evening on the lake or sea. The key to successful boat lighting is selecting the appropriate type of lighting for your specific needs. Options range from LED lights, known for their energy efficiency and longevity, to halogen lights, which provide a powerful beam capable of highlighting specific areas underwater.
The color of the light also plays a significant role. White lights often serve practical purposes by providing clear visibility for nighttime fishing or docking, while colored lights can add a splash of vibrancy, perfect for a festive atmosphere. Blue and green lights are particularly popular for creating a serene underwater landscape, as they mimic natural aquatic colors.
Understanding the water’s effect on light is imperative, as it absorbs and scatters light differently than air. Therefore, selecting the correct placement and angle for your underwater lights ensures maximum effectiveness and coverage. Also, consideration of water depth, clarity, and potential obstructions is essential to achieving the desired lighting effect.
In the world of DIY projects, mastering the basics of underwater lighting opens up a realm of creative possibilities, turning your boat or dock into an illuminated wonderland. So, gear up and get ready to light up your nautical nights like never before!
essential tools and materials
Embarking on your DIY journey to craft mesmerizing underwater boat lights, the first step is to gather the essential tools and materials you’ll need. With the right equipment in hand, you’ll be ready to transform your boat into a beautifully lit aquatic discoverer.
First and foremost, let’s talk about the core component: the lights themselves. When it comes to selecting underwater lights, LED options are particularly popular in DIY projects due to their energy efficiency, durability, and vivid illumination capabilities. If you’re opting for a colored spectacle, make sure you choose LEDs capable of displaying your desired hue, whether it’s the calming blues, tropical greens, or vibrant reds.
Next, ensure you have a reliable waterproof casing. Underwater environments are demanding, and a high-quality casing will shield your lights from moisture and deliver robustness against waves and water pressure. It’s not just about keeping the circuitry dry; it’s about ensuring your lights remain operational and safe to use.
Wiring and connectors suitable for underwater use are crucial. You’ll need marine-grade wires coated with PVC or rubber housing to resist corrosion and provide flexibility. Waterproof connectors are a must for creating secure connections that won’t fail under watery conditions. Remember, the objective is to create a seamless power flow without compromising safety.
Power tools like drills and screwdrivers will come in handy for fastening lights and casings onto your boat or dock. Ensure you have drill bits suitable for your boat’s material, whether it’s wood, fiberglass, or metal, to avoid unnecessary complications. Additionally, heat-shrink tubing will prove vital for insulating wire connections and simplifying the installation process.
And lastly, don’t forget the essential safety gear: gloves for handling sharp or electrical components, eye protection when drilling, and a voltage tester to double-check that your circuit is safe before you power it up.
With these tools and materials in hand, you are well-equipped to breathe life into your boat lighting dreams. Get ready to unleash your creative side and embark on a home improvement project that will illuminate your nights on the water like never before!
step-by-step construction guide
Ready to add a splash of brilliance to your vessel with DIY projects? Let’s dive into the step-by-step construction guide that will transform your boat into a luminescent beauty. Begin by finding the ideal location on your boat to install the lighting. This is crucial for maximizing the illumination effect. Most boat owners prefer areas near the stern or along the hull, where the lights can spread their glow across the water’s surface.
Start by assembling your tools and materials in a well-lit workspace. Ensure your power source is turned off before commencing work to avoid any electrical mishaps. Begin by marking the spots where you plan to mount the waterproof casings and lights. Using your drill, carefully create pilot holes for the screws. This will make attaching the casings easier and prevent the boat material from cracking.
Next, take the marine-grade wiring and cut it to the necessary lengths to connect from the power source to your chosen installation points. Feed the wires through the casings, ensuring they have enough slack to avoid any tension when the boat is in motion, which could lead to breaks or shorts. Secure the connections inside the casings with waterproof connectors. Once all wires are securely attached, use heat-shrink tubing over the joints to reinforce and insulate them against water.
Now, position the lights within their casings, ensuring they are seated securely to withstand vibrations and shocks from waves when sailing. Tighten the casing lids, double-checking that the seals are watertight to prevent any leakage. This step is essential to protect your investment and ensure your lights remain bright and functional for countless adventures.
Double-check all your connections using the voltage tester. There should be no live circuits until you’re confident everything is safely in place. Once you’ve verified the connections, you’re ready to test the lights. Turn on the power and watch as your boat transforms into a beacon of nighttime beauty. Move around to assess if the lights adequately cover the desired areas and adjust as necessary for the perfect ambiance.
Congratulations! You’ve successfully completed the installation and turned a simple boat into a stunning showcase of underwater lights. This home improvement project not only enhances the aesthetic appeal but also boosts safety with better visibility during those twilight sails. Now, prepare to dazzle your fellow seafarers with the spellbinding luminescence dancing beneath the waves.
safety precautions and tips
Creating underwater boat lights is an exciting home improvement project, but ensuring safety throughout the process is imperative. First, focus on electrical safety. Always disconnect the power source before you start working on any wiring to avoid electrical shock or short circuits. It’s advisable to use a voltage tester to confirm no current is present in the wires you will handle.
When performing any DIY projects involving electricity, it’s crucial to wear rubber-soled shoes and work in dry conditions if possible to reduce the risk of electric shock. Furthermore, consult the user manuals of all lighting components and adhere strictly to the manufacturer’s guidelines for proper voltage and connector usage. Double-check that your underwater lights and marine-grade wires are correctly rated for water exposure, ensuring they meet industry standards for underwater use.
Safety shouldn’t stop with electricity; working around boats often involves positioning in precarious places. Make sure to wear a life jacket, especially if your installation site is near the water’s edge. Keep the workspace organized and clutter-free to prevent trips and falls, particularly when using power tools like drills. Remember always to set up your ladder or scaffolding on even surfaces to maintain balance and stability.
As a tip, consider the influence of water depth and currents on your installation. Install the lights during calm weather to minimize movement risks. Additionally, using waterproof materials not only guards against water ingress but also extends the lifespan of your lights, creating a safer long-term installation by preventing malfunctions.
Lastly, it’s worthwhile to perform routine checks on your lighting setup to catch and fix any potential hazards early. Pay attention to signs of wear and tear, such as frayed wires or loose connections, and attend to them promptly. By following these safety precautions and tips, you can enjoy the enhanced ambiance and aesthetics of your boat lighting with peace of mind, knowing your DIY project was executed safely and effectively.
troubleshooting common issues
Even the most seasoned DIY enthusiasts can encounter hiccups when embarking on exciting underwater boat lighting projects. However, fear not, as troubleshooting common issues is all part of the adventure. One of the most frequent problems faced by DIYers is lights not turning on or flickering when installed. This usually stems from improper wiring connections or inadequate power supply. Start by double-checking all wiring connections, ensuring that they are secure and waterproof connectors are properly fastened. A simple solution like re-securing a loose wire might illuminate your issue in no time.
Another common hiccup occurs when lights are not as bright as expected. Often, this results from insufficient power being delivered to the lights or a mismatch in the voltage requirements between the power supply and the lights themselves. Cross-check whether the power source aligns with the specifications of your lights. Sometimes, adding a voltage converter or regulator may be necessary to ensure optimal illumination for your installed underwater lights.
Corrosion is the arch-enemy of any DIY project involving water. If the lights flicker intermittently, suspect corrosion in the wiring connections or at the light source connections. Inspect these areas closely for signs of rust or wear. Cleaning the connections and applying a corrosion-resistant lubricant like dielectric grease can work wonders. Additionally, using high-quality marine-grade materials from the start can prevent such problems in future endeavors.
Water intrusion is another potential issue, where your lights or connectors might not be sealed properly, allowing water to creep in and affect the functionality. Verify that all seals are intact and robust; reapply silicone sealant where necessary to beef up your underwater defense. A meticulous approach to sealing will significantly prolong the life of your underwater boat lighting and maximize performance.
If your setup emits heat or a burning smell, this could indicate overloaded circuits or incorrect wiring. Immediately power down your setup and re-evaluate the circuit load, ensuring it complies with the specifications of your lighting equipment. In persistent cases, seeking assistance from a professional electrician might be the safest option.
DIY projects like underwater boat lighting yield rewarding results, provided common issues are tackled with a patient and meticulous approach. With these troubleshooting tips, you can enhance your home improvement project’s success, turning any problem into a learning opportunity that, when resolved, will light up your nautical nights brilliantly.